
Hex Crawl Guide
The Heart of Daggers Hex Crawl tool lets you build, explore, and run interactive overland maps directly alongside your campaign.
You can create maps by hand, generate entire regions in seconds, add landmarks and travel routes, track your party, hide unexplored areas with Fog of War, and even let your players interact with the map during a live session.
And because Hex Crawls update live, anything you change on the map is immediately reflected for everyone currently viewing it.
Where can I find Hex Crawls?
Hex Crawls can be accessed in two ways:
- From inside one of your Campaigns
- Through the standalone Hex Crawl tool
If you're using a Campaign, simply open the campaign and select Hex Crawl from the menu at the top of the page.
Campaign Hex Crawls also allow you to place and manage your campaign's player characters directly on the map.
Getting familiar with the Hex Crawl screen
Most of your map-building tools live along the top of the screen.

On the top left, you'll find:
Select & Inspect
Interact with tiles and landmarks, move things around, edit information, or generate individual locations.
Terrain Tool
Quickly place, paint, generate, or remove terrain across the map.
Rivers & Roads
Draw rivers, roads, and regional borders directly over your terrain.
Fog of War
Hide unexplored parts of the map from players.
Party Tool
Place your party and individual player characters onto the map.
On the top right, you'll find:
Active Map
Switch between your saved Hex Crawl maps or create a new one.

Generate Map
Procedurally generate an entire region in just a few seconds.
Undo / Redo
Undo or redo changes made during your current session.
Travel Measure
Choose two points and calculate the quickest route and estimated travel time.
Zoom In / Out
Change your map zoom level.
Fit to Screen
Quickly recenter and fit your map into the available space.
Export Map
Export your map as a PNG or PDF.
Map Settings
Control player permissions and additional map display options.
Choosing your map style
If you're viewing the map as a GM, the panel on the left gives you access to your available map assets.

You can choose between:
3D Tiles
A colourful illustrated map style using our 3D terrain assets.
Traditional Tiles
A more traditional tabletop-style Hex Crawl appearance.
Both styles work with the same Hex Crawl features — the difference is purely visual.

When using the 3D tileset, you can also switch between:
- Hex tiles
- Square tiles
We've created matching versions of the 3D artwork for both formats.
This means that if you switch from Hex to Square, Heart of Daggers will automatically find and display the matching version of the terrain wherever possible.
You don't need to rebuild your entire map just to see how it looks in another format.
Choosing terrain and landmarks

The asset panel also lets you switch between:
- Terrain
- Landmarks
From here, you can browse the available Hex Crawl assets and select what you'd like to place on your map.
A Hex Crawl map can contain up to 2,000 tiles, giving you plenty of room to create anything from a small regional map to a very large campaign world.
Using Select & Inspect
The Select & Inspect tool is your main way of interacting with individual tiles and landmarks.
Creating a random location
With Select & Inspect active, click an empty map space to create a new location.
Heart of Daggers can roll up a collection of creative prompts for that tile, including terrain ideas and possible landmarks that fit the area.
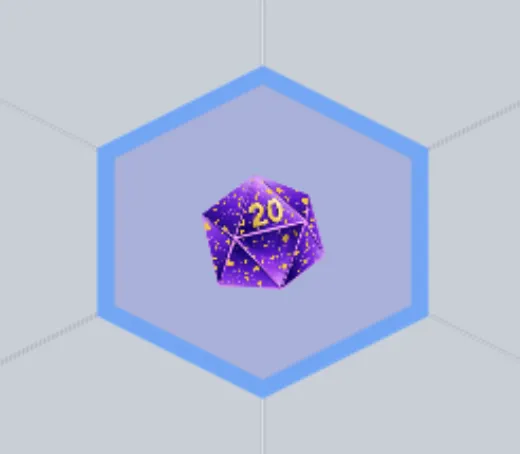
You'll be given a few options before placing it:
Pre-roll
Generate the location and prompts before deciding what you want to do with it.
Place Tile Only
Place the terrain without adding the generated location information.
Place with Generated Details
Place the tile together with the rolled prompts, encounters, landmarks, and other generated ideas.
"We want to go this way... What's over there?"
Moving tiles
You can also use Select & Inspect to pick up existing terrain tiles and move them somewhere else.
If you move a tile onto a space that already contains another tile, Heart of Daggers will ask:
"Replace this Hex?"
The existing tile will only be replaced once you confirm.
This helps prevent accidentally deleting something you've already built.
Moving landmarks
Landmarks can also be selected, picked up, and moved between tiles.
Simply select the landmark and move it to its new location.
Editing an existing tile
Selecting an existing terrain tile opens its information panel.
From here you can view or edit:
- Tile name
- Description
- Whether the name is visible to players
- Whether the description is visible to players
- Terrain Travel Difficulty
- Habitat
This lets you turn a simple terrain tile into a fully documented campaign location.
You might name a forest The Whispering Woods, add a description for your own GM notes, and decide whether your players should be able to see that information when they explore the tile.
Remember to press Save Details before leaving the tile.
Tile Mechanics
Tiles also include a second tab called Mechanics.
This allows you to track some important campaign mechanics directly on the map.
Shadowblighted
Marking a tile as Shadowblighted places an X on the tile and adds a purple border around it.
You can then mark the area as:
Completely Overtaken
This adds a red border to the tile, making heavily corrupted areas easy to recognise at a glance.
Sanctuaries
You can also mark a tile as a Sanctuary.
Sanctuaries display a diamond marker on the map.
Once a Sanctuary has been created, you can optionally add a:
Soul Echo
Soul Echoes can be marked as:
- Visible to players
- Hidden from players
- Recovered
- Not yet recovered
This makes it much easier for a GM to keep track of important locations and player progress across a large world map.
Remember to press Save Details when you're finished.
Editing a Landmark
Selecting an existing Landmark opens its own information panel.
You can edit:
- Landmark name
- Description
- Whether the Landmark is visible to players
Landmarks can be used for anything important that exists on top of your terrain — settlements, ruins, castles, towers, shrines, strange discoveries, and more.
Remember to press Save Details before closing the Landmark panel.
Using the Terrain Tool
The Terrain Tool is designed for quickly building large sections of your map.

When you select it, a new toolbar appears along the bottom of the screen with three options:
- Freeform
- Shape
- Tile Remover
Freeform
Freeform lets you draw directly across the map.
Everything inside the area you draw can then be populated with terrain.
You can choose to:
Procedurally Generate Terrain
Heart of Daggers will generate a mixture of land or water tiles throughout the selected area.
You can also choose whether generation should include:
- Landmarks
- Soul Echoes
And you can exclude terrain categories that you don't want appearing.
For example, you might generate a large green region while excluding:
- Volcanic terrain
- Desert terrain
- Cold Lands
This gives the generator some direction while still allowing it to surprise you.
Alternatively, you can choose to:
Use Selected Asset
This fills the entire selected area using whichever terrain asset you currently have selected in the asset panel.
It's great for quickly creating a large forest, ocean, desert, mountain range, or similar region.
Shape
The Shape tool works in much the same way as Freeform.
Instead of drawing freely, you create a square or rectangular area on the map.
This is particularly useful when you want to quickly fill a large, clean section of the map.
Tile Remover
The Tile Remover lets you drag across an area to delete multiple tiles at once.
It's much quicker than removing tiles individually when you're making large changes to your map.
Tile Variations
Some terrain assets have multiple visual variations.
When the Terrain Tool is active, hovering over a tile with available variations will display:
Click for Variations
Clicking the tile cycles through the different versions of that asset.
This is particularly useful when building large areas using similar terrain.
Instead of having every forest, ocean, snowfield, or desert tile look identical, you can quickly introduce a little variety while keeping the same terrain type.
Rivers, Roads & Borders
Select the Rivers & Roads tool and a new toolbar will appear at the bottom of the screen.
You can choose between:
- River
- Road
- Borders
Rivers
Choose River and begin drawing across your map.
River artwork is placed directly on top of your existing terrain.
As you draw, the river pieces automatically orient and connect to neighbouring tiles.
This means you can simply draw the direction of the river and Heart of Daggers handles the appropriate connecting artwork.
Roads
Roads work the same way.
Draw across the tiles you want your road to pass through and the system automatically creates and connects the appropriate road segments.
It's perfect for creating trade routes, highways, wilderness trails, and connections between major settlements.
Borders
Borders allow you to place thick dark boundary lines along the edges of tiles.
They're useful for visually separating important regions such as:
- Kingdoms
- Cities
- Dangerous territories
- Factions
- Provinces
- Special travel zones
Fog of War
Fog of War lets the GM hide unexplored areas of the map from players.
Select the Fog of War tool and a toolbar will appear at the bottom of the screen.
You'll also see quick options for:
Cover Everything
Apply Fog of War across the entire map.
Reveal All
Remove Fog of War from every tile.
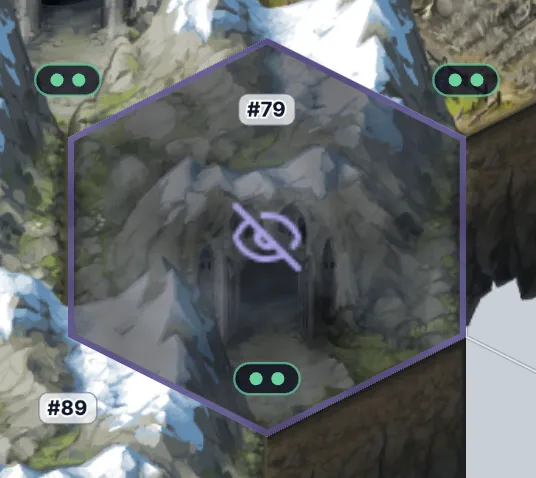
As the GM, Fog of War remains transparent enough for you to continue seeing and managing the map.
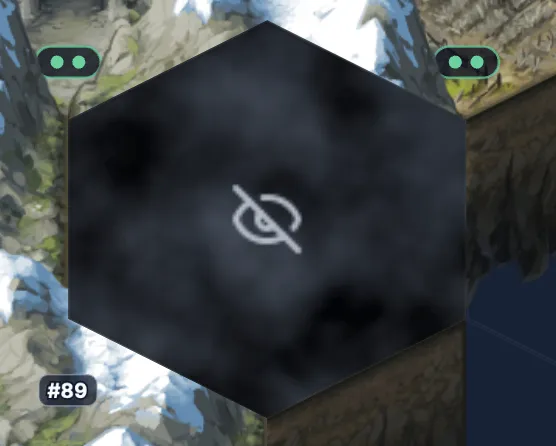
Players see a much darker animated fog covering unexplored tiles.
Fog of War also hides landmarks and other information located on that tile.
You can then gradually reveal the world as your players explore.
Using the Party Tool
The Party Tool allows you to place campaign characters directly onto your Hex Crawl map.
Select the Party Tool and choose a tile.
The first time you place the party, all player characters are placed together as a group.
From there, you can move the group around the map simply by dragging it onto another tile.
Splitting the party
Yes. We even let you commit the classic tabletop sin.
Right-click the party group to view its individual members.
You can then select a character and separate them from the group.
That character can now be moved independently somewhere else on the map.
You can create multiple groups or leave characters travelling individually.
Rejoining the party
Moving an individual character onto another player or party group automatically combines them.
Simply place them together and the group reforms.
Landmarks and other important markers on the tile will reposition themselves to make room for party tokens.
Can players move their own tokens?
Oh yeah.
Open Map Settings and enable:
Allow Players to Move Tokens
Players will then be able to move their own party group or individual character tokens around the map.
If you'd rather keep movement controlled entirely by the GM, leave this option disabled.
Using Active Maps
This is useful if your campaign spans multiple regions, worlds, islands, planes, continents, or other major locations.
Select Active Map at the top of the screen to manage them.
From here you can:
- Search your saved Hex Crawl maps
- Load another map
- Create a new map
- Rename the current map
- Delete a map
Creating a new map
Select:
Active Map → New Map
Enter a name for your map and press Save.
Heart of Daggers will create a fresh blank Hex Crawl and automatically make it your active map.
Renaming a map will always rename whichever map is currently active.
Generating an entire map
Don't feel like placing hundreds of tiles by hand? Thought so :)
That's what Generate Map is for!
Select Generate Map in the top-right corner and you'll be given several options.
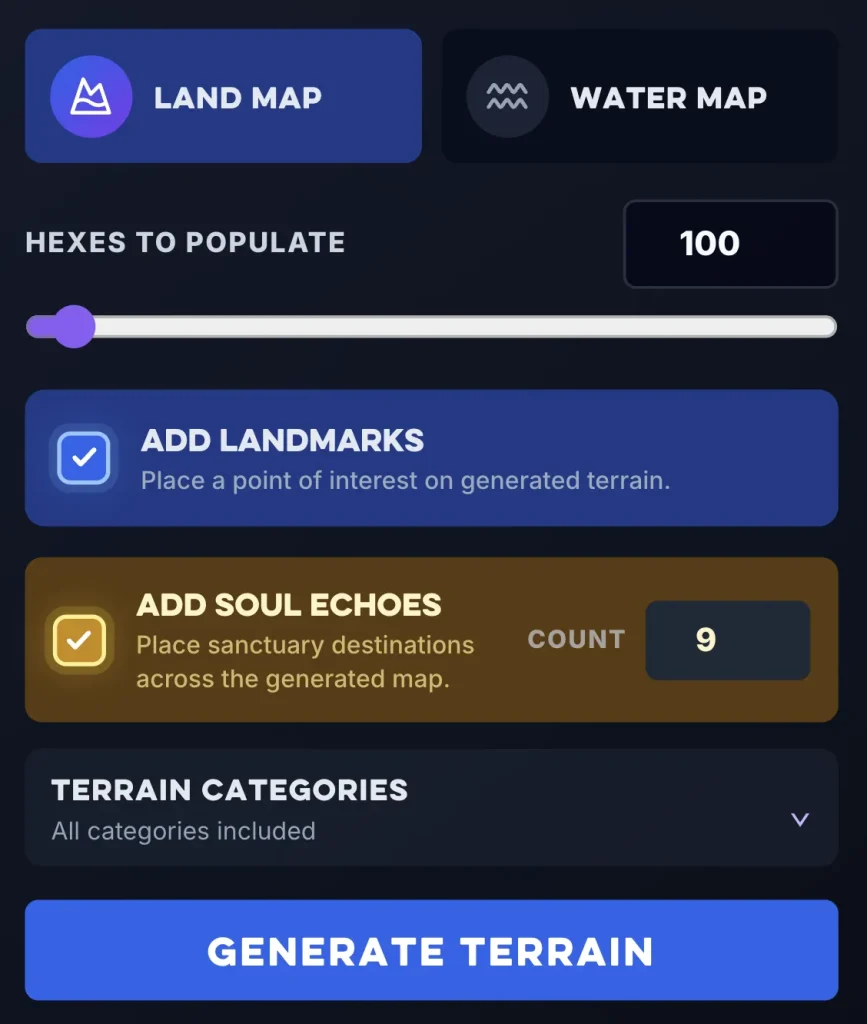
Land Map or Water Map
Choose the general style of map you'd like to generate.
Land Map
Generation will focus primarily on land-based terrain.
Water Map
Generation will heavily favour oceans, coasts, islands, and other water-related terrain.
It doesn't mean every single tile will be that type — it simply gives the generator a strong direction.
Hexes to Populate
Choose how many tiles you'd like the generator to create.
You can generate up to 1,000 tiles at once.
Add Landmarks
Enable this option and the generator will automatically scatter appropriate landmarks throughout the generated terrain.
Add Soul Echoes
You can also ask the generator to automatically place Sanctuaries and Soul Echoes throughout the map.
The default generation amount is 9 Soul Echoes.
Terrain Categories
Don't want certain environments appearing?
You can exclude terrain categories before generation.
For example, you might exclude:
- Volcanic
- Desert
- Cold Lands
The generator will then build the map using the remaining available terrain categories.
When you're happy with your settings, press:
Generate Terrain
The map will normally be created within a few seconds, depending on how many tiles you've requested.
Undo & Redo
Hex Crawls support up to 100 Undo and Redo actions during your current session.
If you accidentally remove a region, move something incorrectly, or simply don't like your latest change, use the Undo button in the top-right corner.
Undo history applies to your current editing session.
Measuring Travel
The Travel Measure tool is a quick way to figure out how long a journey across your map might take.
Select the Travel Measure tool, then choose:
Point A and Point B
Heart of Daggers will calculate the shortest available route between those locations.
It will show you:
- Number of tiles travelled
- Estimated Travel Days
- The route across the map
Travel time is calculated using the Terrain Travel Difficulty assigned to each tile.
This means crossing difficult mountains can take longer than travelling through open plains, even if the number of tiles is similar.
Travel Measure and Fog of War
When a player uses the Travel Measure tool, Fog of War is taken into account.
Any tile currently hidden behind Fog of War is treated as unknown and will not be used when calculating the route.
This means players can only plan journeys using areas of the map they have actually discovered.
Zooming and centering the map
You can use the controls in the top-right corner to:
- Zoom in
- Zoom out
- Fit the map to your screen
- Recenter the map
These are particularly useful when working with very large Hex Crawls.
Exporting your map
You can export your Hex Crawl whenever you'd like.
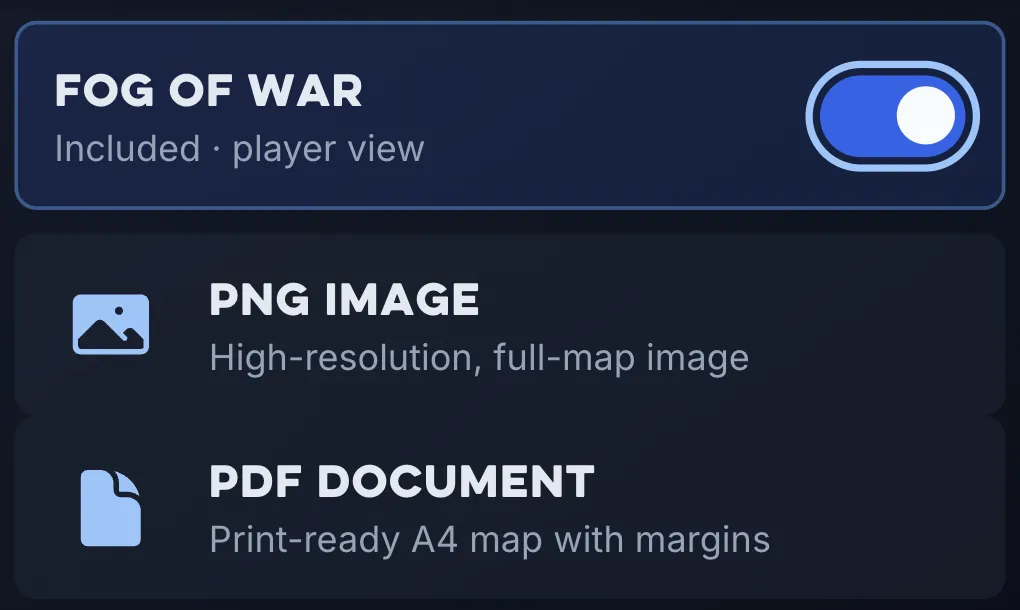
Select the Export button and choose between:
- PNG image
- PDF document
You can also decide whether your exported map should include Fog of War.
This makes it easy to create:
GM Maps
Export the full map without Fog of War so you can see everything.
Player Maps
Export the map with Fog of War included so undiscovered locations remain hidden.
Map Settings
The Settings button contains a few additional options for controlling your map.
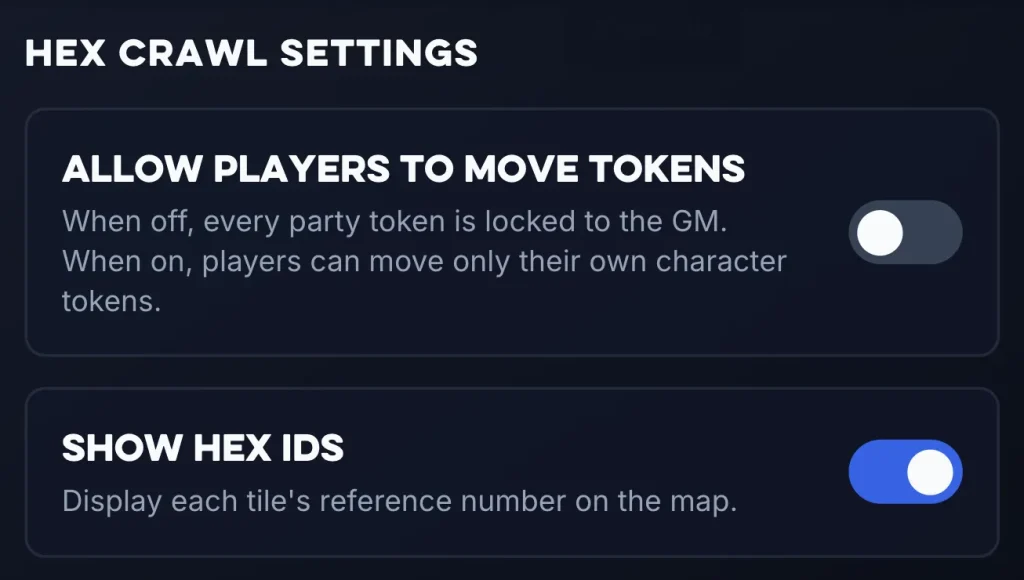
Allow Players to Move Tokens
Enable this if you'd like players to control their own character or party tokens.
Disable it if you'd prefer all map movement to remain under GM control.
Show Hex IDs
Enable Show Hex IDs to display a reference number on every tile.
For example:
#03, #04, #05, etc
Hex IDs can be especially handy when keeping campaign notes, referencing locations during play, or discussing specific areas of a large map.
Right-clicking tiles
Right-click any existing terrain tile to open additional options.
From here you can:
- Browse alternative assets for that terrain
- Replace its appearance
- Remove the tile
This is a quick way to make small visual changes without switching tools.
Live multiplayer updates
Hex Crawls are built to work during live play.
If your GM changes the map while players are viewing it, those changes automatically appear for everyone.
That includes things like:
- Moving the party
- Revealing Fog of War
- Adding terrain
- Placing landmarks
- Changing locations
- Updating map information
You don't need to refresh the page or reload the map.
This makes the Hex Crawl tool useful not just for preparing a campaign beforehand, but for running exploration at the table while you play.
Build the map together, reveal the world as your players travel, split the party when they inevitably make questionable decisions, and watch your campaign world grow one tile at a time.